Nambe Media: Blogging Tips

Nambe Media

"We connect globally, with quality and trustable content."​

Wednesday, 18 April 2018

Create A Fully Verified PayPal Account In Ghana

April 18, 2018 0
Create A Fully Verified PayPal Account In Ghana


In this article, i will love to share with you a method to actually create a paypal account in Ghana for free.

Avoid using proxies, Tor browser, IPs from another country, or public Wi-Fi areas to sign into your PayPal account. If you must use a VPN (Virtual Private Network), use a dedicated VPN source. Make sure you use only one device to sign in your PayPal Account always.

What is the ideology behind this method

The idea is you can be a Kenyan staying in the Ghana and that does not prevent you from using your Kenyan PayPal account in Ghana. Simple as that. I bet you thought i was going to mention some complicated formula.

What do i need to create my fully verified PayPal account in Ghana?

Your Real Full Name
Your Real Email Address
Your Real Ghanaian Phone Number
Your Real Date Of Birth
Your Real Addresses (Street address of your home or business location)
Your Real ID number (Could be any one of these: Driver’s / NHIS / Voter’s)
Your Real Town Or Region
A debit card from UBA, GT Bank and some few international banks.

Before we get to how to create the account, there is something you should know. There are two types of PayPal accounts:

Personal Account

With this account, you can shop in your country and around the world from your computer or on your mobile - all without sharing your financial info with the sellers.

Business Account

With this account, you can accept payments and send invoices to your customers. It’s easier and more secure to sell to anyone, anywhere, and any time.

Back to how you can get your fully verified PayPal account in Ghana created

• Visit PayPal Kenya via this link: https://www.paypal.com/ke/home
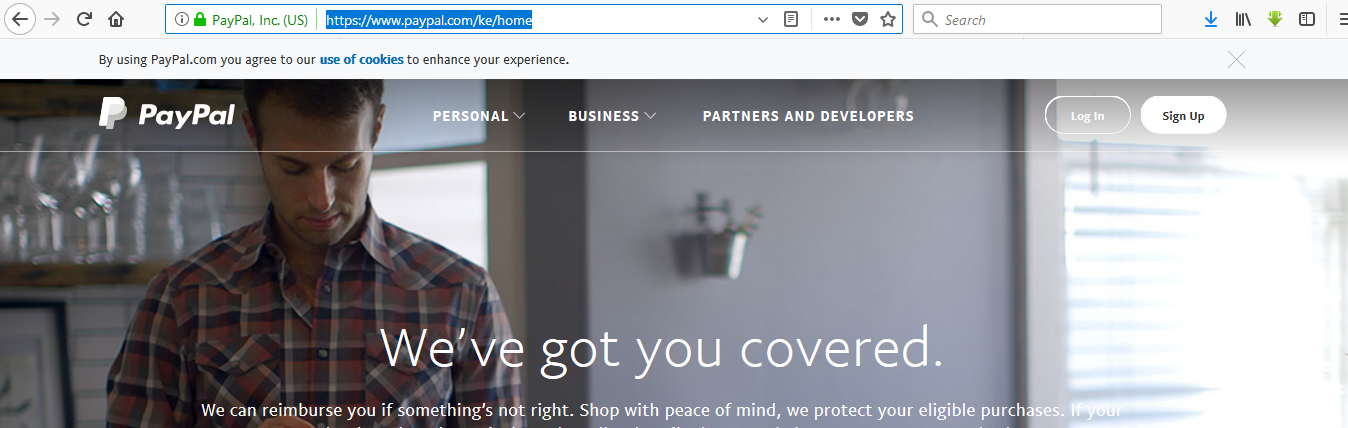


• Click on the "Sign Up" button at the top right-corner of the page
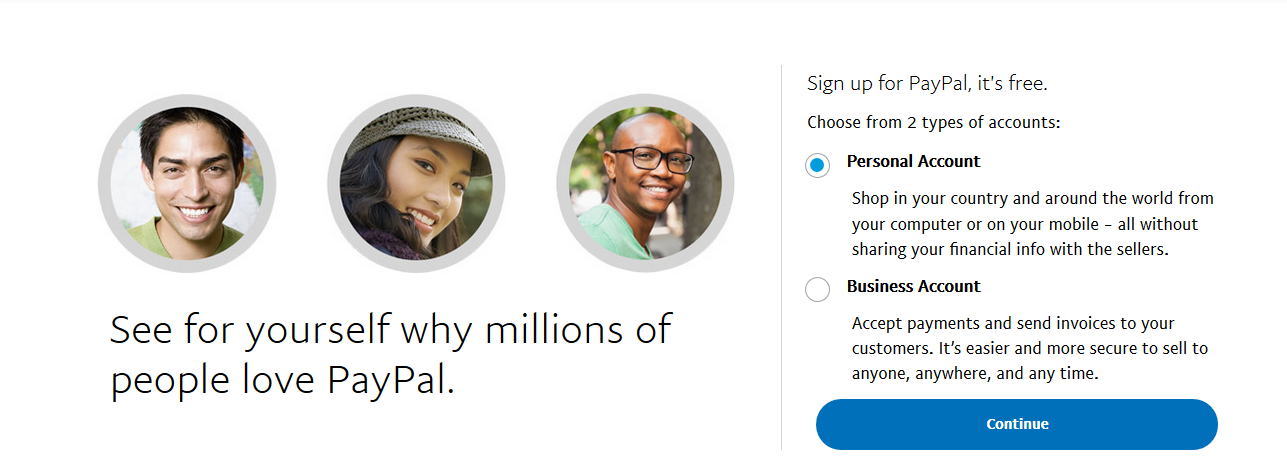


• Select a business account or a personal account and click continue.
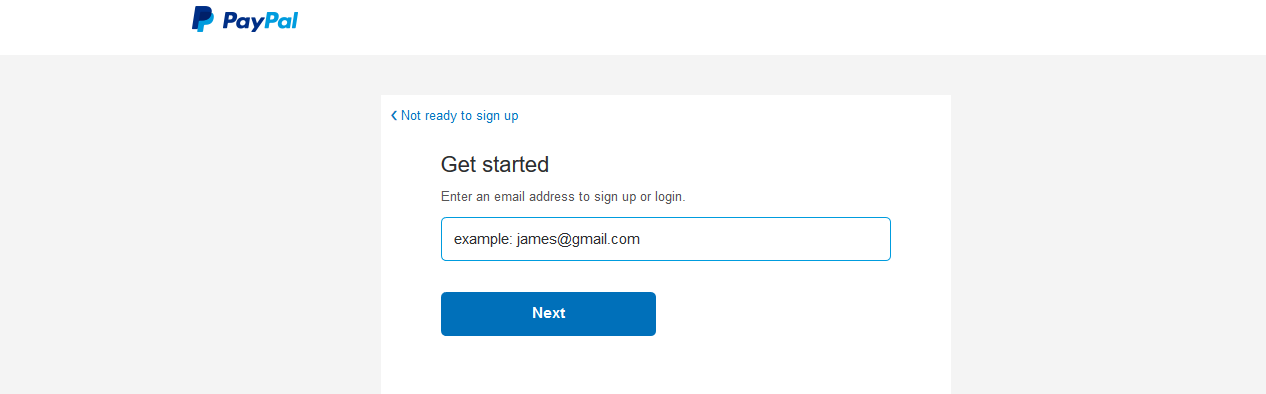


• We will use a business account for this exercise. Enter your real email address and Click on continue
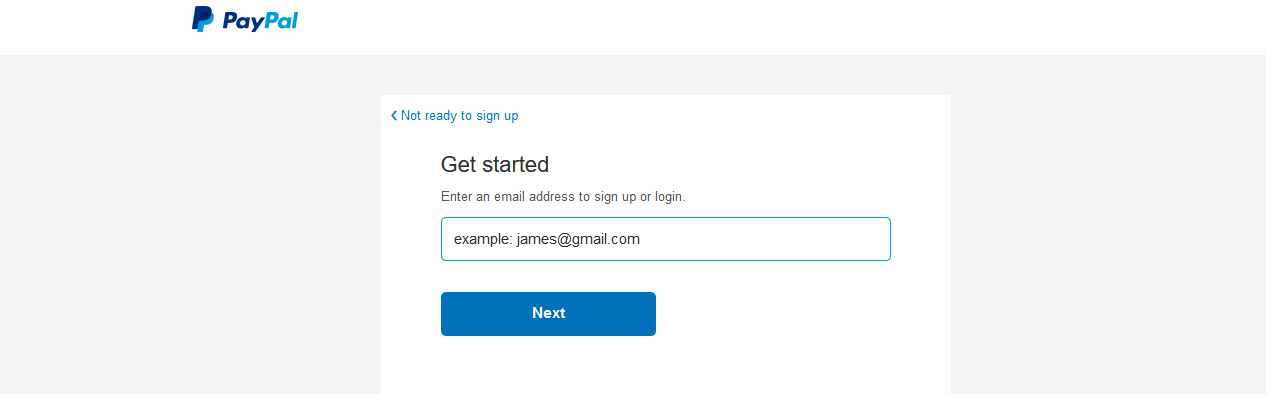


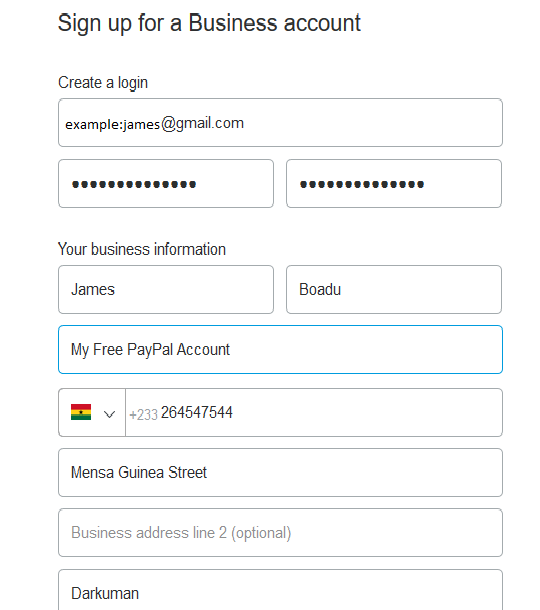
• Fill in the details with your real credentials and Click on "Agree and Continue" button. Check the images below for reference.


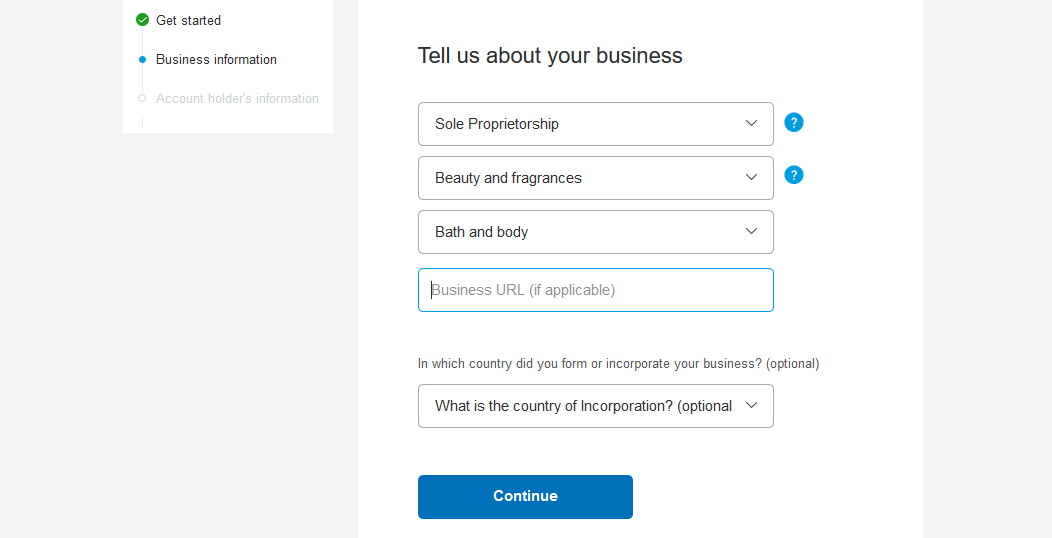
• Select your business type, the category, the sub-category and your business website address in case you have one. I will advice you to leave the country tour business was formed empty because Ghana is not in the list and Click Continue.


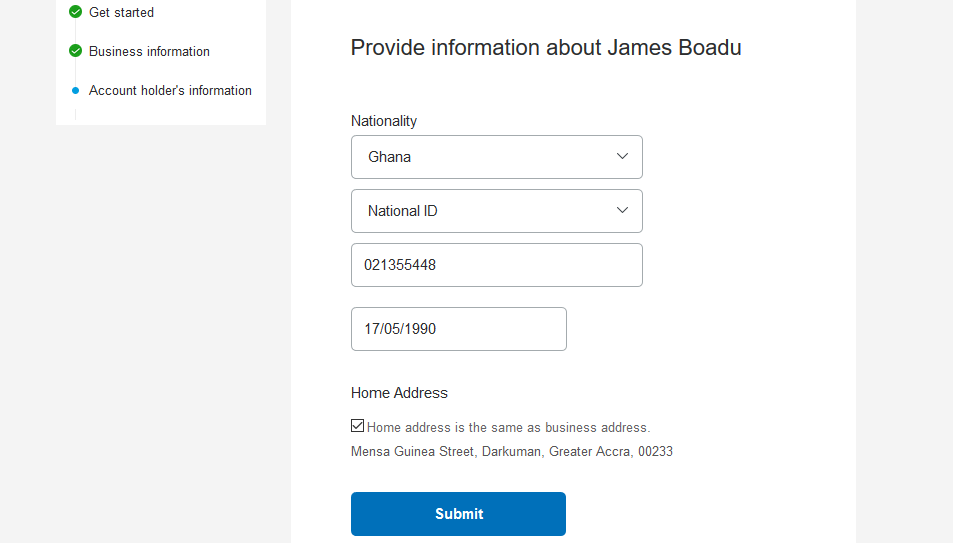
• Fill your nationality details by selecting the country as Ghana. Select a national identity document whether a Driver's License, Passport or National ID. Then enter your Ghanaian ID Number and your real Date Of Birth. Check your Home address as your Business Address. Continue from there by clicking the "Submit" button.


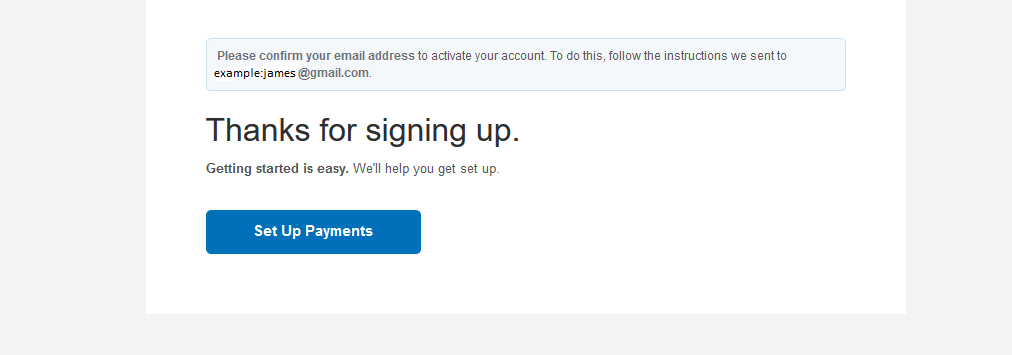
• If you are seeing the image below, then click on "Set Up Payments" button.


I have my account setup now. So how do i get it fully verified?

To verify your paypal account in Ghana, we will need to confirm two things.

The first is to cnfirm your Email Address
So how do we go about this.

First you will have to click "Profile" at the top-right corner of the paypal account dashboard next to the "Logout" button
From the dropdown under the To-do-list, Click "Confirm Email Address".
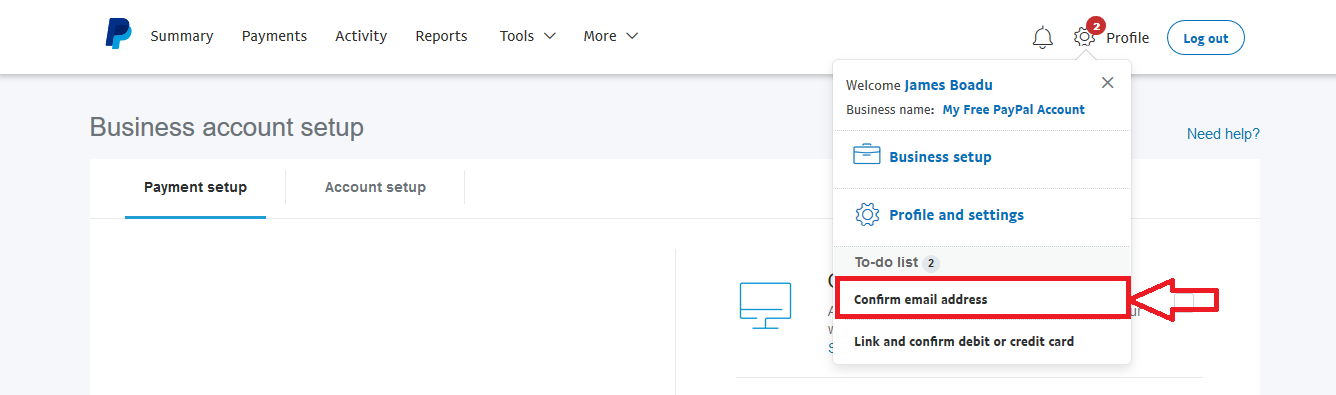


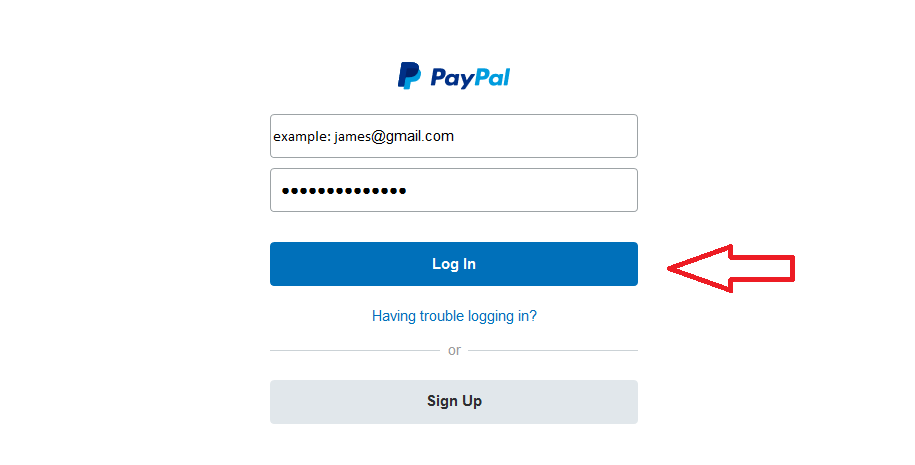
• After the click, you will be logged out and asked to log in again. After you enter you email address and password and login. Click on "Edit"


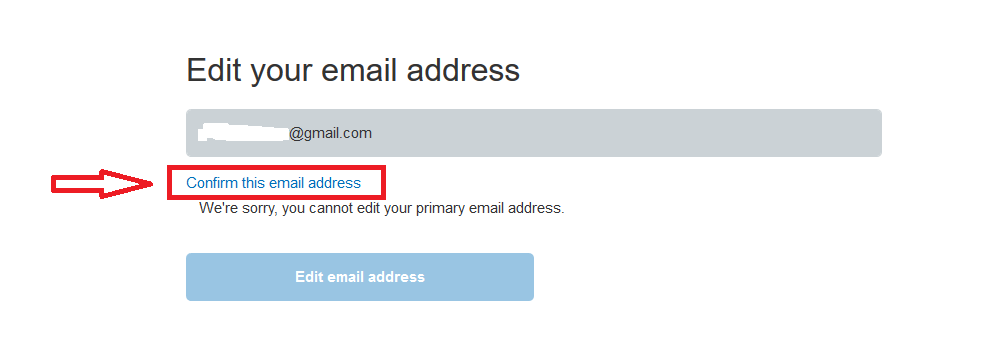
• Click on confirm email address and go to your mail to click on the confirmation link from paypal.


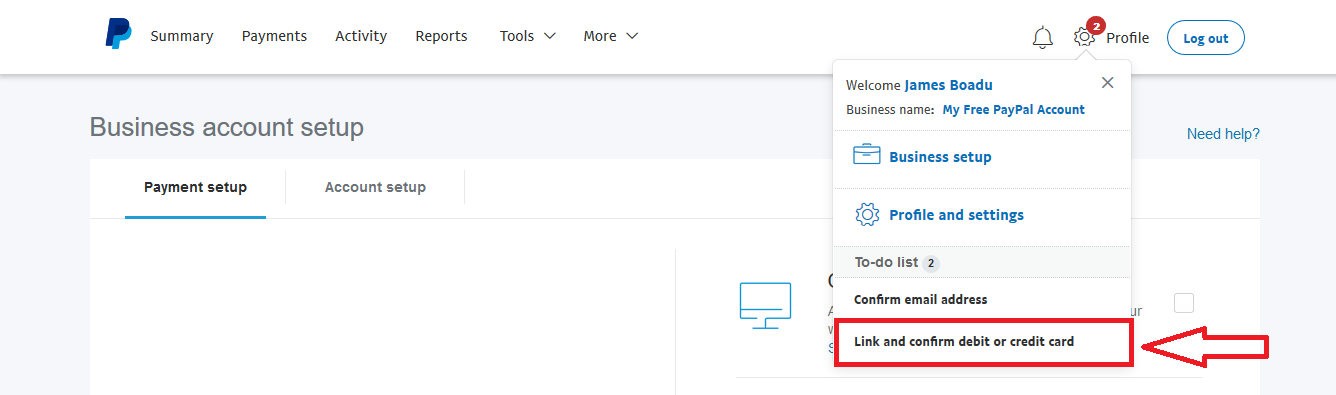
• The last verification is to link and confirm your debit or credit card. Click on the button and fill in your debit or credit card details to link to your account.


I hope at the end of this article, you were able to set your account.

Wednesday, 20 December 2017

Easy: Newspaper 8.5 to 9.5 theme activation

December 20, 2017 0
Easy: Newspaper 8.5 to 9.5 theme activation


The easiest one is to activate these these versions is to;

1. navigate to /wp-content/themes/Newspaper/includes/wp_booster/td_ajax.php

2. find this: if (self::self_check($id, $ec, $ad) === true) {

(which should be located on line 926)

3. And change it to: if (self::self_check($id, $ec, $ad) === false) {

Save the file and that’s it.

After:

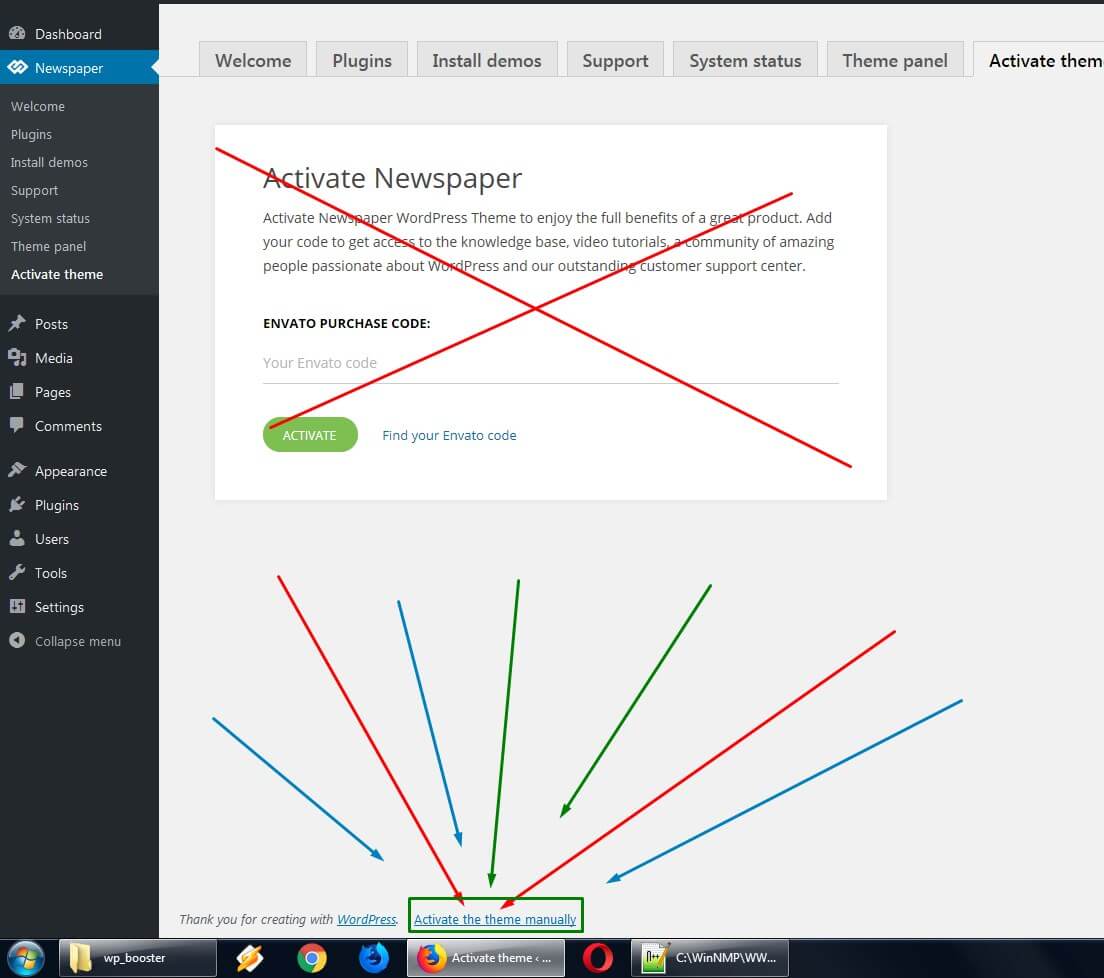
To activate the theme use MANUAL activation link:


Go to admin dashboard > Newspaper > Activate theme > click Activate the theme manually (which is located all the way down in the footer)

You can put anything you like. Here’s mine:
Envato purchase code: nambemedia.com

TagDiv activation key: nambemedia.com

Click Button ACTIVATE => Done

Theme activation

Theme successfully activated using manual activation. Thanks for buying our product.

Thursday, 17 August 2017

How to remove Showing Posts With Label in blogger

August 17, 2017 0
How to remove Showing Posts With Label in  blogger


For any default Blogger layout, the " Showing posts with label" message will show up above the blog posts each time you click on a label link.

Since this message is pretty useless and annoying for many bloggers, they prefer to have it removed. If that's your wish, then follow the steps below:

Removing "Showing post with label...show all posts"


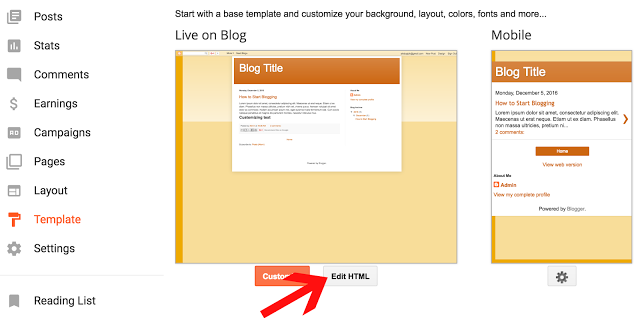
Step 1. From your Dashboard, go to "Template" and hit the "Edit HTML" button.


Step 2. Click anywhere inside the template code, then search using CTRL+F for this line of code (press Enter to find it):

<b:includable id='status-message'>

After you found it, click on the sideways arrow next to it that will expand the rest of the code.


Step 3. You should see a similar code that you need to remove along with the first one as well:
     <b:includable id='status-message'>
      <b:if cond='data:navMessage'>
      <div class='status-msg-wrap'>
        <div class='status-msg-body'>
          <data:navMessage/>
        </div>
        <div class='status-msg-border'>
          <div class='status-msg-bg'>
            <div class='status-msg-hidden'><data:navMessage/></div>
          </div>
        </div>
      </div>
      <div style='clear: both;'/>
      </b:if>
    </b:includable> 


Step 4. Replace the code above with this one:
<b:includable id='status-message'>
<b:if cond='data:navMessage'>
<div>
</div>
<div style='clear: both;'/>
</b:if>
</b:includable>
Step 5. Save the changes by clicking on the 'Save template' button.

Now visit your site or blog and click on any label that you may have to confirm that the box doesn't display anymore.

So this is how you can remove 'Showing Posts with Label' message in Blogger.

How to add audio files to Blogger Posts

August 17, 2017 0
How to add audio files to Blogger Posts


Sometimes you want to include some audio track to your blog, which could either be a podcast or something related to your content.

In this article, we will show you how to add audio files to posts in blogger.

Step 1: Creating Google Site for Hosting Audio File

You have to upload an audio file via an external host, and the most credible source is Google Site.

  • Visit Google Sites using this » Link and Sign In with your Gmail ID and password.
  • Click on the Create button at the top-left corner.


  • Give a title to your site and select a template for it. 
  • You may select any template and give any name to it. I am using Audio File as the file name and Blank as a template. 
  • Once you have given the name, it will automatically generate the URL of your Google site.
  •  Now scroll down and check-mark the box, I’m not a Robot. 
  • When you're done with with this Settings, select the Create button at the top.

  • Your site is now ready. However, you cannot add any audio or other file directly to the site. Therefore, you need to create a File Cabinet on the site to start uploading your files on it. 
  • To create a File cabinet on the same page of your site, click on the Create New Page button at the top.


  • Give a title to the new page and select File Cabinet, from the Select a template to use option. 
  • And, click on the Create button at the top.


Step 2: Uploading Audio File on Google Site 

  • Now, you need to be on the same page and Click on Add Files button and then browse your audio file which you want to upload.

  • Your audio file will start uploading, which might take some minutes to get it done. You may repeat this process to upload other files, but remember that, the limit shouldn't exceed 100 MB and a file of 25 MB. 
  • You'll have to make the file accessible for your readers after it gets uploaded.
  • Click on the Home button from the side bar and select the gear icon from the top. You’ll see different options out of which you need to select Sharing and Permission.


  • Check if the permission is granted to Public then it is ok, if not then Click on Change button under Who has access.


  • Now, select On-Public on the Web and Click on Save button.
  • You need to get the complete URL of the Audio file which you have uploaded.
  •  Move to the Audio file, right click on the download button, and select Copy Link Location or Copy link Address. (Depending on your Internet browser)


Step 3: Adding Audio Files in Blogger

  • Go to Blogger >> Create a new post for your Audio file. 
  • Move to the HTML section in your post editor.
  • Copy the code below and paste it at where you want the Audio file to appear.
<audio controls> <source src="Your-Copied-Google-Site-URL-Here" /> If you cannot see the audio controls, your browser does not support the audio element </audio>
  • Replace; Your-Copied-Google-Site-URL-Here with the link of the audio file you copied in the earlier step.
  • Finally, publish your post and you are done. 
This is is all about adding an audio file.

Was it helpful? If yes, then don’t forget to share this article with your other friends and circle too. You may never know that your share may be proven helpful for many of the users out there. 

Saturday, 22 July 2017

How to create a Blogger Account?

July 22, 2017 0
How to create a Blogger Account?


Are you wondering how to create a Blogger account ? Many of us do, because Blogger is one of the most popular blogging platforms out there and it can provide us with an extraordinary, fun way to express ourselves in the online world.

Not only is it Blogger a very large blogging website, but it's also full of categories that you can blog on. You have complete control over what you want to blog, and that does make Blogger an amazing platform to begin with. Yet you do have to wonder how to create a blog on Blogger.

We are here to help you understand all of that and so much more as fast as possible, thanks to a detailed guide that will showcase all the necessary instructions in a very easy to read manner.

Creating a Google account

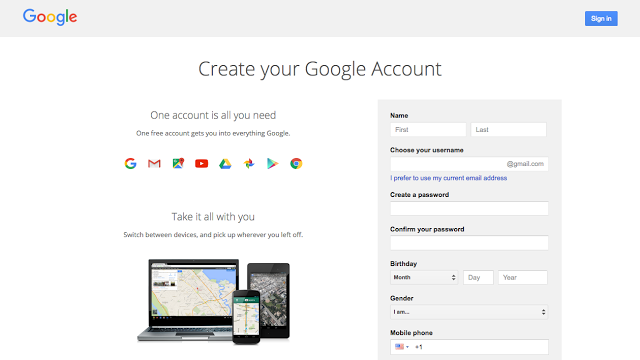
What you need to know here is that Google owns Blogger, and because of that you will need to use a Google account to sign in to this platform. You can
create a Google account now and then you will be able to continue to the platform without a problem.

By creating a Google Account you will be able to access a wide range of Google apps and services like Drive or Mail for example.

Visit the page above and share all the necessary information in order to create the necessary Google Account. Thankfully, the process is very easy and it will take only a few minutes of your time. In case you already have a Google Account, you will need to sign on the Blogger page.


Creating your blog

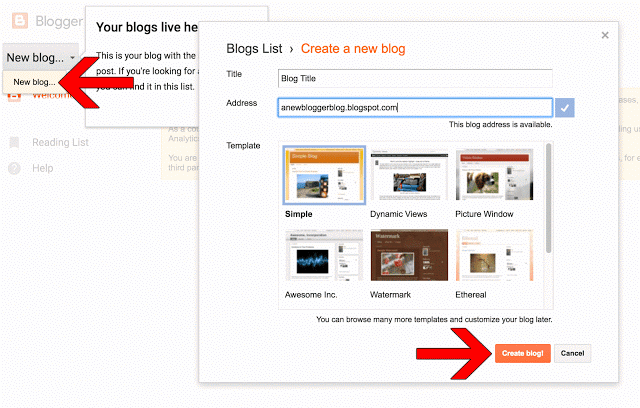
Once you are located on the Blogger page, you will need to press the New Blog button in order to start a blog. You will receive a new window where you will learn how to create a Blogger account. This will enable you to share all the necessary information.

  • Make sure that you add a title for your blog in the Title area. This is very important because it will allow you to entice the visitor to read more about you and your content. So, try to make the title relevant and appealing.


  • In order for users to find your blog, you will need to create an Address for it. Your blog will have a blogspot.com address, but you will need to choose what goes before blogspot.com. Basically, you can opt for something like abcdef.blogspot.com or anything like that. Remember that this can be modified in the long run. The great thing here is that you will immediately be able to see if that address is available or not. This means you will have the ability to check the address availability really fast.


  • The next step will require you to choose from any of the presets that are available at this point. Starting with a Template is a good idea, but do remember that this can be modified afterwards as well. So it's a good idea to just pick a template and move onward.


Once you have the blog title, address and template ready to go, you will have to press the Create blog! button. This process will take a little bit until it's completed properly, so just wait for a few seconds as the new blog will soon be added to the blog list. So, if you were wondering how to create a blog on Blogger, this is the simplest way to do it.

Maybe the best thing about how to create a Blogger account is that the entire process is very easy to do. Even beginners will have no problem creating and setting up an account. The customization options are plentiful here, so you shouldn't have any problem setting your account really fast!
Starting to post

Although the blog address will be available, you can't call that a blog unless you start writing content in there. Obviously, you will need to learn how to write a post on Blogger, and we are here to help you with that right now.

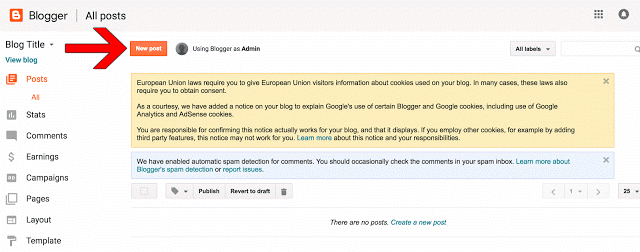
In order to start writing, you will need to click the Create a new post link or you can press the New Post button. Once you do that, you will gain immediate access to the post editor and here you can write the blog as well as make any necessary changes to content that you already wrote.


Write a title for your post

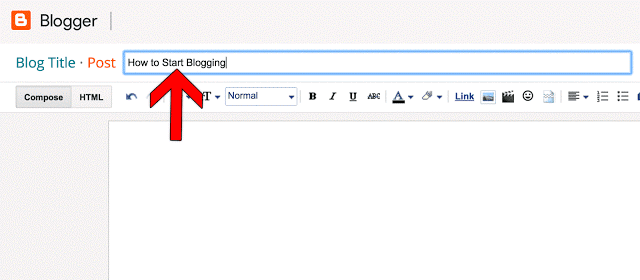
Your post needs to have a title. Towards the top of the Blogger editor you will see that there is a Post title box. Add in the desired post title there. This shouldn't eat up a lot of your time, just try to come up with a post title that is enticing, very easy to use and a delight to read for your audience.

A catchy title can be great. Don't opt for the clickbait title that you can see nowadays, make your title feel informative and fun to read as that's what you want. If you want to write a first post, you need to make it introductory.

Write about the goals you have, the type of content you want to add and so on. It will not be easy to write down the first words, but if you create a good title it will be easier for you to translate thoughts into words!


Start the writing process

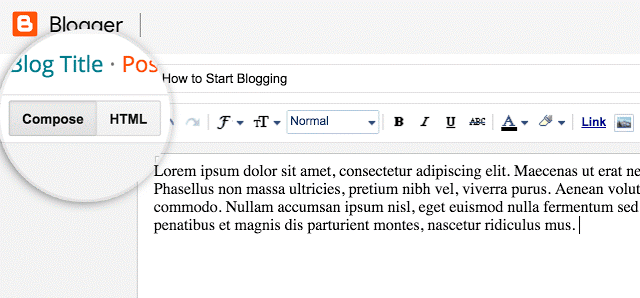
You can create a Blogger post in 2 ways. You can either write the post in HTML or you can use the word processor included here.

You have a button located in the top left corner which helps you switch between any of these two writing models.

The HTML editor helps you create better web content and you can also use it to insert some special web functions. On the other hand, the word processor is more than qualified to offer you all the extra help you might need here.


Customizing text

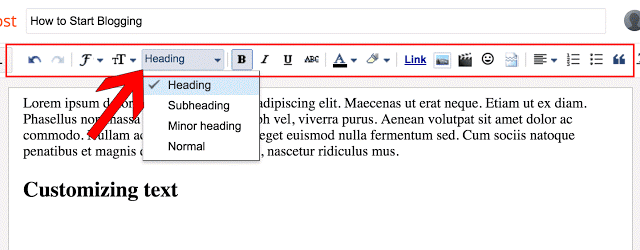
If you want, you will be able to customize the text you want without a problem. You will have the ability to use the toolbar located on top of the editor to modify the text as you see fit.

This includes formatting, color, size, alignment and so on. You have a Normal drop-down that helps you change the type of content you want to add, so you should consider changing between the desired heading type as you see fit.

This also changes the way search engines process your content, so keep that in mind. If possible, try to break the content into easy to read pieces.

Use the Headings in a strategic manner.


Add an image to your post

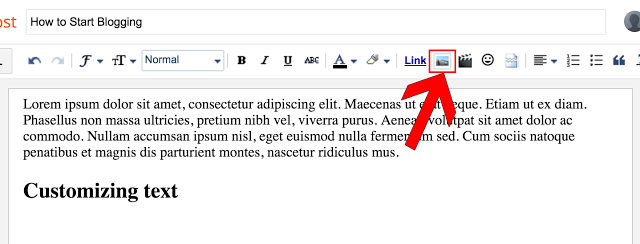
If you want to make your blog post enticing, you should try to add at least an image. These images make posts a lot easier to read and it's a good idea to make the most out of images if you want to share a great experience for your audience.

You will have an "Insert Image" button right above your text editor, on the toolbar. There are multiple options, you can either upload them from your PC/Mac, you can share a link or you can use your webcam to take a picture if you want.

However, if you link to other websites, make sure that you showcase their copyright or just refrain from doing that to begin with. There are many sites who do not agree with the idea of having their content stolen, so try to stay away from that!


Modify the post settings

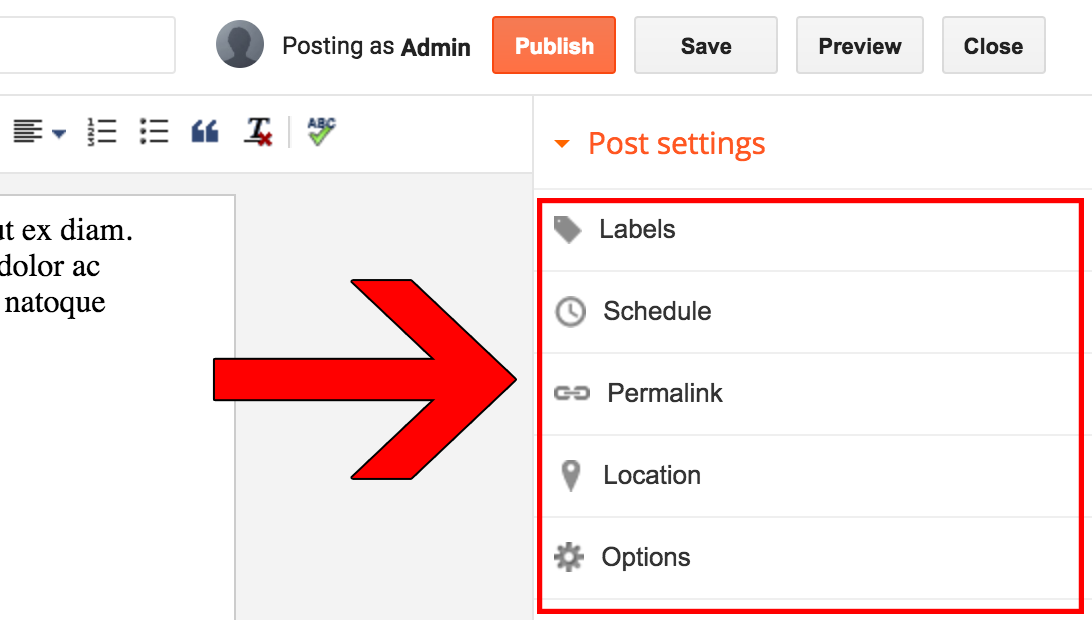
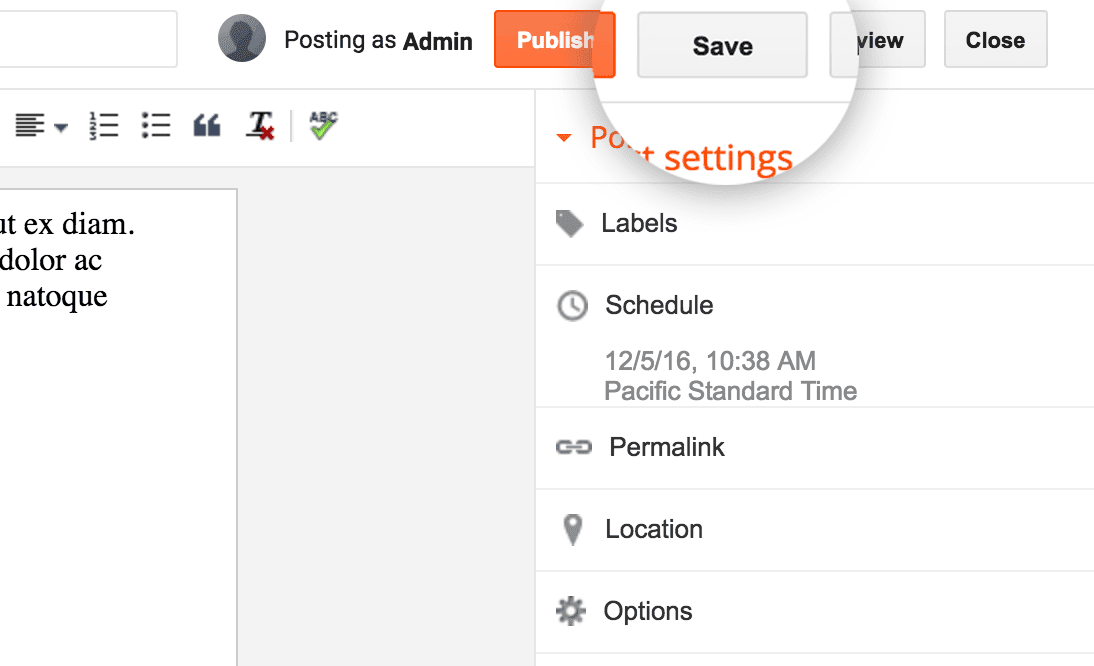
If you look on the right side of your Post Editor, you will be able to access some Post settings. Remember that these make it easy for you to customize your post right before you choose to publish it!


  • Labels are useful if you want to group multiple posts which are very similar to one another.
  • Schedule allows you to publish your content at a later date. It can come in handy if you don't want to share multiple articles at the same time.
  • Permalink is an option that allows you to select the way your post will be linked to in the future. Usually it will maintain the title structure, but there are other link types you can choose from as well
  • Location enables you to add a location tag for your post. It's a very good tool for those that move/travel often.
  • Options allows you to modify some features like the user ability to comment on a post for example. You can also choose the way your HTML code is interpreted here as well.

Previewing

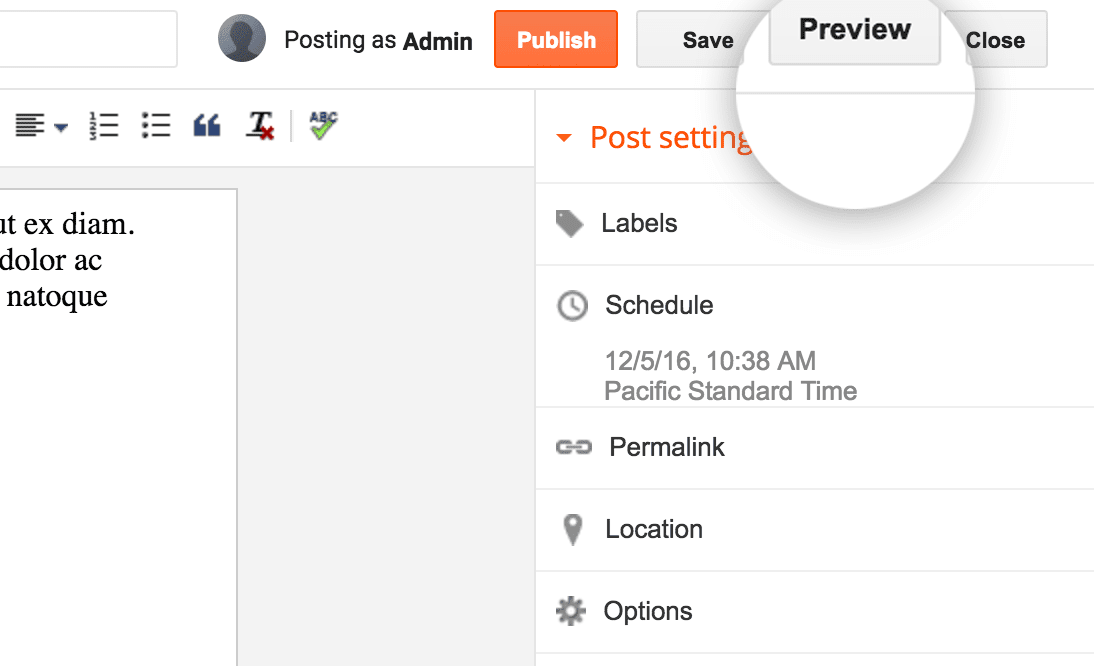
A great thing about previewing your post is that you will be able to see how it looks when a reader will access it. This is the right time when you need to check your post for any errors, be it grammar or structural ones.


Save the post for later

This is not the same as scheduling. When you save the post for later, it means that the post just isn't finished at this time and you will continue to work on it at a later time. You can see this as a draft for your future post.


Publishing the post

If you double or triple checked the post and there are no errors, then you are good to go. Still, it's a good idea to go through it at least one more time to ensure that all the content you want is there and you don't have to make any more changes. Add all the necessary labels and tags, make sure that you inserted any links, images and other information that you might need.

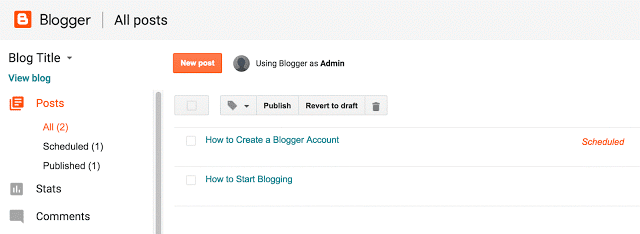
Once everything is ready, you will just have to press the Publish button located at the top of the panel. This is when Blogger will automatically redirect you to the Posts page. Here you will see the post right on top.


Don't believe that your work is done at this point. In fact, it's far from that. You still have a long way to go before you properly optimize and improve your blog . After all, people won't be drawn in to your blog if you have just a single one to begin with. Work hard to write great posts as they will be able to make your blog stand out in the long haul.

Of course, you do need patience. Writing a good blog does require time and you shouldn't rush the content creation. Prioritize quality over quantity all the time. If you don't do that, the experience will be very well worth it in the end.

How can you expand your blog?

As we mentioned earlier, writing a single post is great but it won't draw in a lot of traffic. If you want to write a good post, one that will bring in lots of readers and views, you want to post as often as possible.

Quality content will always bring in traffic. Update the blog as often as you can. If you can share at least a post per week, you should do that. A good stream of posts will always come in handy, so make sure that you always write some good, enticing content that will help populate your blog.

If possible, we recommend you to create a post Schedule as this will help you better optimize the way you post. This way you will be able to prepare your content beforehand, so you can have it ready when you want to create a new post. The best approach is to write more than 1 post at a time. One can be posted and the others can be kept for a later date if you so desire.


Write for a niche

Generalized content works but it won't really deliver good results for your audience. If you want to get the best results, we recommend you to find a niche as fast as possible. Not only does a niche help you target specific users, but it will also help you become an authority on that topic.

We recommend you to research a niche and become an expert on it. This is the best way to create a large audience for a niche and from here to reaching success in blogging will be just a small step.

Don't rush the content creation process, especially if you write for a niche. Creating redundant content will just keep people away. As long as you take your time and focus on results for your audience, the experience will be an amazing one.

Of course, use the proper content structure in order to cater to the needs of search engines, all while maintaining the content relevant for humans as well!

Reader interaction

Once you learn how to create a blog on Blogger you can create more than a blog in order to reach multiple audiences. But the idea here still remains, you will need to interact with the audience. The community will grow more and more as you put out content, so make sure that you always interact with the audience.

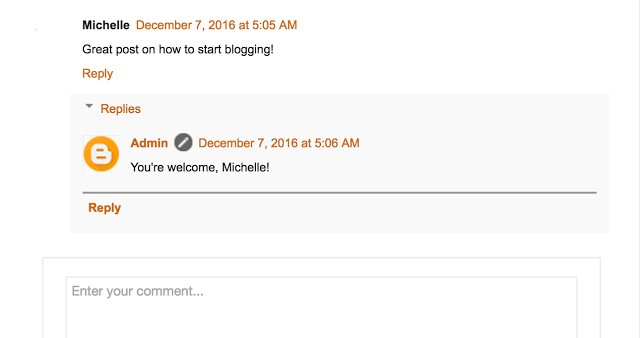
Read the comments and moderate them, make sure that you remove spam. Also, reply to people that are interested in what you write. This will help create and nurture a community around your content, which can be very interesting to do!


Advertising your blog

Your blog will need advertising if you want it to grow really fast. One of the best ways you can do that is by sharing it with people anywhere you can. From social networks to social media or any other location, all of these are great places where you can share your blog.

We recommend you to try and do the following:


  • Post a short headline and a link to your article on Twitter.
  • Single Blogger is a Google Product, make sure that you use the Google buttons in order to share on Google Plus and perform other similar actions.
  • Encourage readers and friends to share your Blogger posts on Facebook and anywhere they can. This will help you reach a large audience really fast.
  • Make sure that you comment on forums and other blogs. Link to your post there if it's meaningful for that particular topic. This type of practice is called backlinking and it's very good for SEO.

Place ads

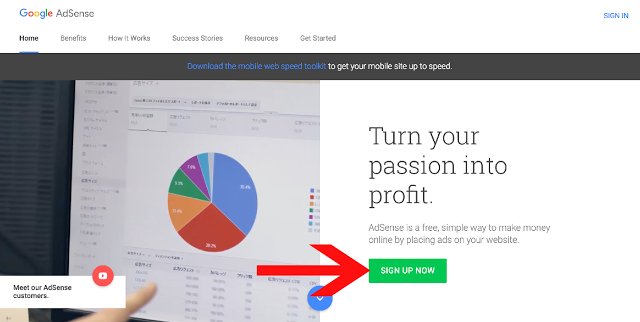
Ads are very important if you want to monetize the blog. You won't be able to monetize your blog with AdSense unless you have a blog active for around 6 months, so keep that in mind. You also need to have at least 18 years of age and you also have to obey the TOS. AdSense allows you to receive payments based on the amount of impressions generated by your blog.


Blog customization

You can modify just about anything you want on Blogger, it all comes down to you to make the right changes! For example, you will be able to press Layout and then you can modify the block content for each section of your blog. You also have the ability to Add a Gadget if you want.

Blogger has lots of add-ons to choose from, all of which can help you better define your blog!

If you want to customize your Template, keep in mind that there are multiple customization options to choose from. You can also keep the template you have now. Programmers can press the Edit HTML button so they can modify the CSS and HTML code.


Stat tracking

Blogger has a dedicated option named Stats where you have the ability to monitor the blog performance. Here you have the ability to see the amount of views you get. This way you can identify what posts are performing better than others. As a result, you know what content works great for your audience in the longer term!

Learning how to create a Blogger account is really easy and you can feel free to create multiple blogs if you want. Just make sure that you write content for all of them. Plus, you can also monetize each one of your blogs if you so desire.

Take your time and make sure that you provide valid information for your readers.

This should be the main reason to create a Blogger account in the first place!